|
Finder Shortcuts: Command Option Control Shift Tab |
Shift Command Option Command Control Command Control Option Command Selecting Files in a Folder |
Function Keys |
TextEdit Shortcuts: Open, Save, Find Fonts Cursor Movement Selection Spelling |
Other Shortcuts: Preview Safari |
|
Magic Mouse & Trackpad
|
|
For many mousing tasks I prefer the Trackpad or a cheap, two-button mouse.
However, the magic mouse really is 'insanely great' for one thing: scrolling. Placed between keyboard and trackpad, it becomes an extension of the Trackpad: 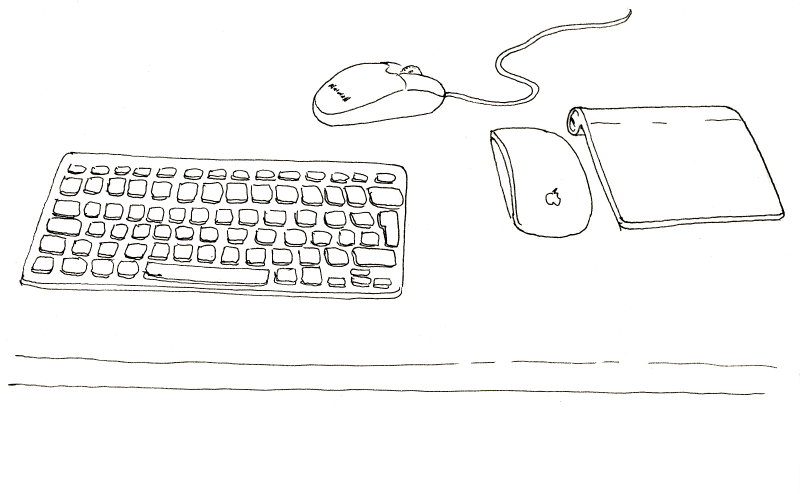
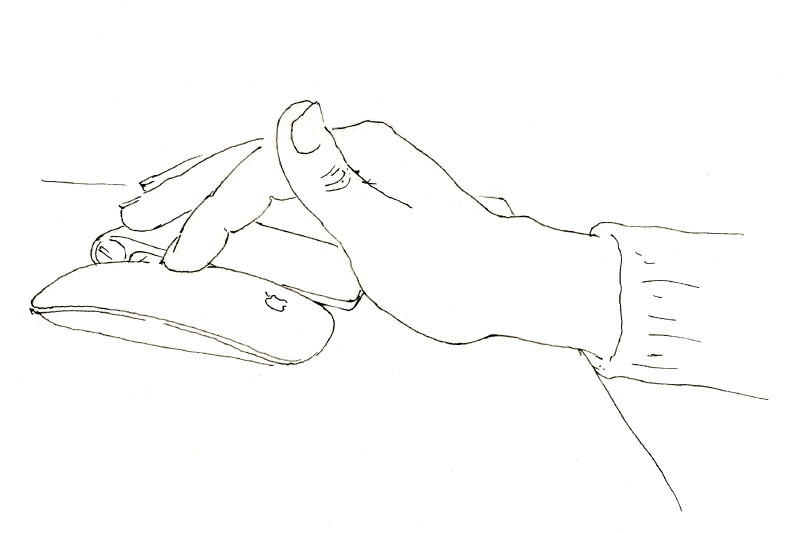
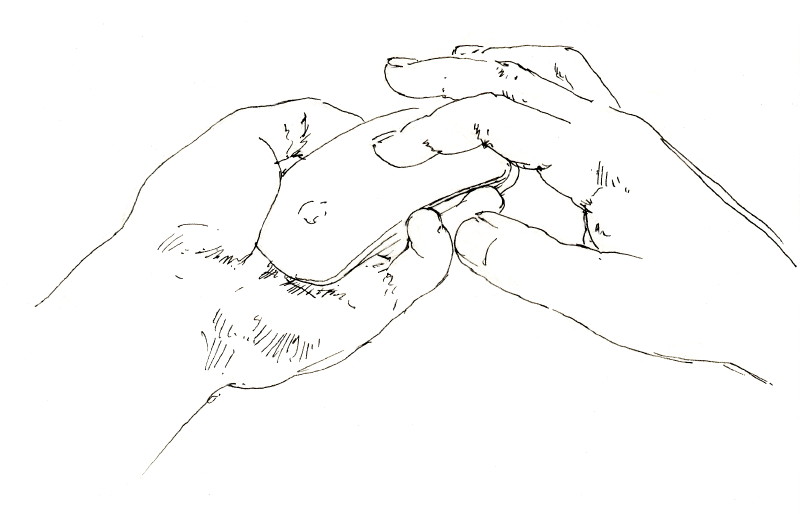
If your fingers are greasy from munching potato chips or a buttered muffin, you can still scroll using your (hopefully clean) little pinky: 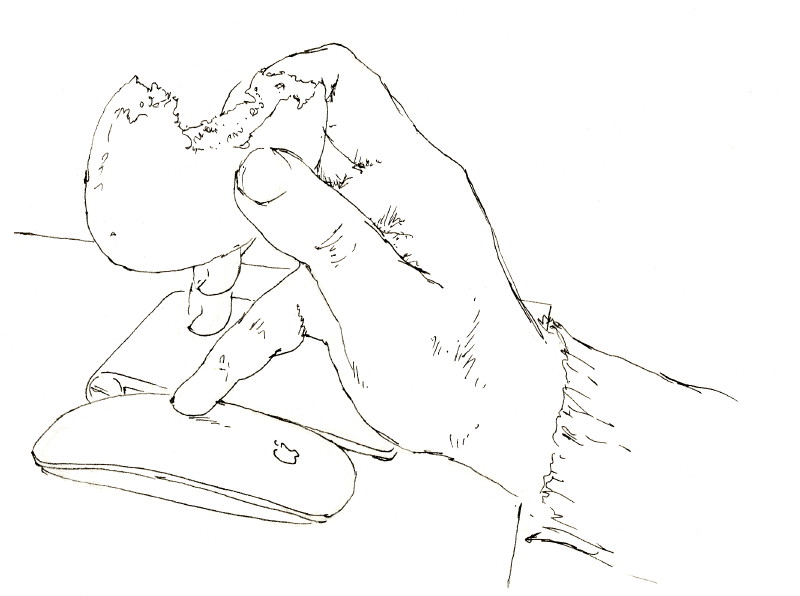
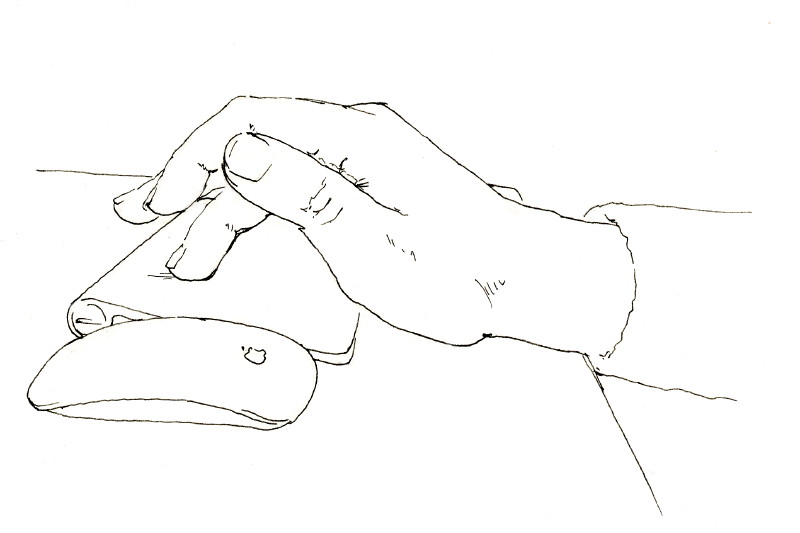
The best way to use the Magic Mouse: take it off the table and hold it in either hand, like a TV remote. You can use just one hand and 'move the screen' with your thumb. 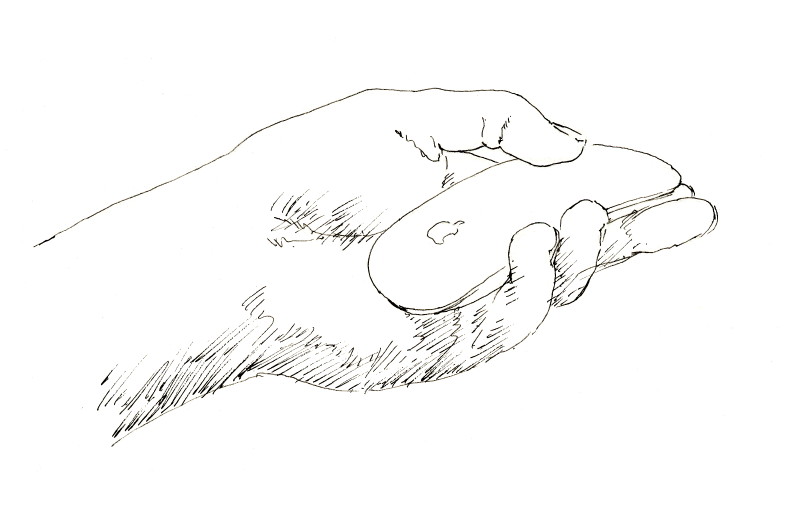
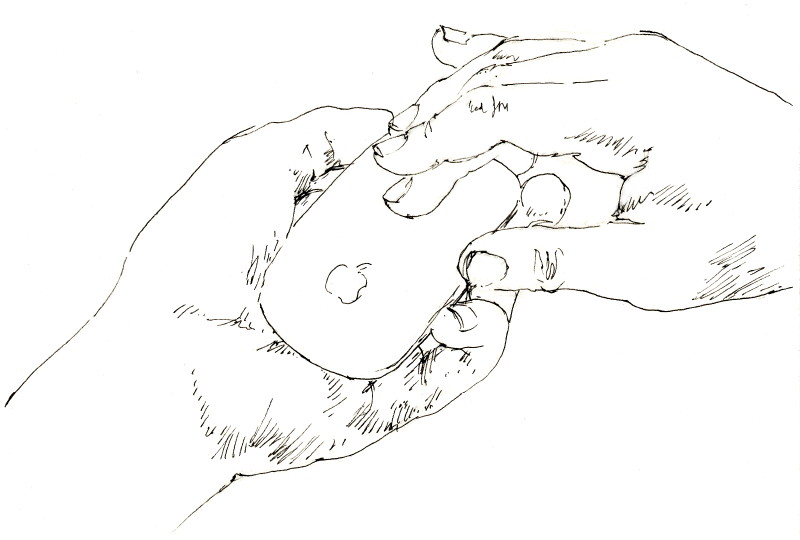
Or hold it with both hands, using both thumbs. You can even put your feet up and the mouse on your tummy, stroking it like a pet hamster (or mouse). What I use the Magic Mouse for: The double-tap can be added for even more zoom.) If there's a lot of clicking required, or image-processing (etc) to be done, I use a cheap, wired, two-button mouse (always connected) in combination with the Magic Mouse. Yes, using two mouses side-by-side looks silly, but the scrolling really is that much better on the Magic Mouse. (And yes, the plural of mouse is mice, but mouses is also correct.) What I use the Trackpad for: 3 finger drag - press command - drop - moves item(s) from one folder to another on a different drive (the green 'plus' near the cursor disappears when you press command) 1st method Move the cursor with one finger to the start of your selection, place three fingers on the corner of the trackpad and move to the end of your selection. You can start with three fingers and finish using only one finger. 2nd method Move cursor to beginning of selection, do a one and a half tap on the corner (that means, tap twice, but leave finger on the trackpad after the second tap) Move that finger to select. If you reach the edge of the trackpad, but want to select more, do a little 'finger moonwalk' - while the first finger remains on the edge of the trackpad, place another further away from the edge, lift the first, and continue. This has to be done quickly. If that's too much hassle, use the Shift key: if your selection isn't complete, lift finger from trackpad, press Shift, move cursor to where you wanted the selection to end, and tap once. 3rd method Tap at beginning of selection (on a webpage double-tap one word), press Shift and select the text with Arrow_down (for the lines) and Arrow_left (for words/letters). This is also handy if you missed just a few words or letters with methods 1 or 2. 4th method Use trackpad and Magic Mouse simultaneously. Good for large selections. Start selecting with three fingers, then use your thumb on the mouse to move the text up or down. Or take the mouse off the table and scroll with your left hand while selecting with your right. Before using mouse or trackpad, get them to work properly. This means changing the settings. The Mouse/Trackpad settings are in three places inside the System Preferences. Here's how to do this with shortcuts: 1. Option F2 or Option F12 (depending on which hand you use) opens System Preferences 2. Command L ('Show All') (or type 'mo', arrow_down, Return - in which case you can skip step 3) 3. Click on the Mouse Icon 4. Set 'Tracking' to Fast (all the way to the right). 5. Click on (enable) all little boxes (6 of them). Some just replicate trackpad gestures, but don't do any harm. 6. Again, Command L (or type 'Command A', 'tr', arrow_down and Return) 7. Click on the Trackpad Icon 8. Set 'Tracking Speed' to Fast 9. Tick all 15 boxes, especially: tap to click (This does not disable clicking with the trackpad.) 10. Command L (or type 'Command A', 'ac', arrow_down, Return) 11. Click on the Accessibility Icon 12. Set 'Double Click Speed' to one or two notches below fast. (Tapping is faster than clicking a mouse.) 13. Click on Trackpad Options. 14. Set Scrolling Speed to 'Fast' 15. Click on (enable) Scrolling with inertia (I think that's default anyway) 16. Click on (enable) Dragging 'without Drag Lock' (It slows the responsiveness of the trackpad) 17. Type Return (or click 'Done') 18. Click on Mouse Options. 19. Set Scrolling Speed to 'Fast' 20. Click (enable) Scrolling with inertia 21. Type Return (or click 'Done') If you would like to use even more Gestures, try the free app 'BetterTouchTool' . |
|
FINDER
|
|
Switching between Applications
command tab - switches to the next open application If that application has several windows open, command tab displays the frontmost window. If that application has no windows open, all you see is the application's name in the menu (next to the apple menu). (repeating tab: cycles through all open applications) shift command tab - (the same in reverse) (use this when you cycle round the open apps and 'miss' the one you want.) Make your favourite applications open automatically on startup: right-click application-icon in Dock / choose Options / tick Open at Login That way, when you want to create a new document, you can command tab until your application comes up, and type 'command N'. command tab, hold command - displays the 'application picker' (or 'application switcher'). Use arrow_left, arrow_right to move around. command tab, hold command, Q - quits the application that's highlighted in the application picker Switching between Windows
command ` - moves to next open window of the same application. This includes Finder folders, it moves from folder to folder. The ` key is the one that also has ˜ (Tilde) on it. As above, if you miss the window you wanted by typing too quickly, use shift command ` to go back. On the German Keyboard, which hasn't got a Tilde key, it's the key in the same position, the one next to the left shift key. If you still use a really old OS on a German computer, you would have to assign this shortcut: (Apple menu / System Prefs / Keyboard / Shortcuts / Keyboard . Look for 'Move focus to next window', click on the shortcut (command `) and replace it with another. There's another shortcut in that section called 'Move focus to active or next window'. You might as well enable that, it means you can do this: Fn Control F4 - move focus to next window (Any window of any application.) Fn Shift Control F4 - move focus to previous window (the same in reverse). Command ` doesn't work in full screen mode. Try to avoid full screen mode. See Control Option Command section for a shortcut to enlarge windows (a shortcut for the green button). Switching between Windows with Application Exposé
When you have a great many windows or folders open, and finding the right one would need a lot of command ` switching, you could use App Exposé instead. App Exposé displays all open windows of one application (like all Safari windows, or all folders etc, including those sitting in other 'Spaces'). 1. Control arrow_down, (or, if you prefer to use the trackpad: four fingers swipe down) 2. type first letter(s) of the folder/window you want, 3. Return (Switch between windows via the menu:) 1. Fn Control F2 (moves focus on Apple menu) (this shortcut needs to be enabled in System prefs) 2. W (moves focus on Windows menu) 3. Space (folds down Windows menu) 4. Type first letter of the window you want 5. Type Space or Return |
|
Shortcut Dictionary for Finder
COMMAND command A - select all (items in the front window) (option command A - deselect all) command C - copy to clipboard command D - duplicate (makes a copy of selected item(s) and puts it next to it) command E - eject (hard-drive, flash memory, dvd etc) command F - find (searches the whole Mac or the frontmost folder . If you want to search the folder, type command F. Up comes this: 'Search: This Mac (on grey oval field) and next to it the folder name. Click on that (the grey oval field moves from 'This Mac' to the folder name). command H - Hide Finder command i - get info (dialog box with various information about selected item) command J - show View Options Box (icon size, date, kind, tags etc. You can also enlarge the type size of the file names, very useful on a large or retina monitor) command K - connect to server command L - make alias Better: press option-command and drag item(s) into where you want the alias of them to be. command M - Minimise (same as the yellow button) (I never use this) |
|
|
command O - open (document/folder/application) command P - print command Q - quit (the frontmost application) command R - show original (of Alias) (this used to work in iTunes too, now it's: shift command R) command T - create a new tab (it used to be: add to sidebar, which now is: control command T) command V - paste command W - close (folder, document - not the application, with some exceptions, like Dictionary) option command W - close all folders (or all windows of the same application) command X - cut (in Finder this only works for file names/text in dialog boxes) |
|
|
(command Y - opens file in Quick Look - but you can just type space instead) command Z - undo command 1 - view folder as icons (good for picture files. Notice the little slide, to enlarge the icons. - Type 'Command J' and tick 'Show item info' to always see the pixel size of each image) command 2 - view folder as list (Very efficient way to display a lot of files) command 3 - view folder as columns command 4 - view folder as cover flow command ] - move back to previous window command [ - move forth to previous window command , - open application prefs (of any current app including Finder) (Option F2 - open System prefs) command . - cancel command F3 - exposes/covers desktop or: F11 (Fn F11) or: Shift Command D to see it as a folder command F5 - Turn VoiceOver on/off command space - open spotlight search (can be used as an app launcher by typing first letter(s) of app) command delete - move to trash (without asking you for permission) command delete when item in trash is selected - return to original location (or: command Z) command arrow_up - open enclosing folder (navigate to parent folder) (with the folder you started from highlighted - so you can then go back with: command arrow-down - open (same as command O) (opening a folder inside a toolbar-free folder will open it as a new window - to close the toolbar-free folder (at the same time), use option command arrow_up) command arrow_right - expand folder in list view (Hierarchical view of selected folders) command option arrow_right - expands folder and also its subfolders command arrow-left - collapse folder(s) in list view (handy for closing all of them together) command drag item to other volume - move & remove it command drag item into sidebar - puts it there (shortcut: control command T) (dragging items out of sidebar: just drag them out, no need to press command) command at start up - disable virtual memory command drag inactive window (=window in background) title bar - moves inactive window (without bringing it to the front) command click Dock item - open the folder it's in (command click Dock application icon will open the Application folder with that application highlighted.) command click (or right-click) on file name (at the top) - shows folder structure, in which you can click to open the folder with the file highlighted |
|
OPTION option F10 (or F11, or F12) - opens sound preferences option F2 (or F3) - opens display preferences option F3 - opens misson control preferences option click zoom button - cascade all finder windows option drag file to another folder - copies file to new location option drag folder A into folder B which already contains folder A - displays dialog box offering to 'merge' them: creating one folder A containing the contents of both option eject - eject secondary media drive option drag window side - expands/reduces window on both sides, when one side hits edge of screen lets you go on with the other option drag window corner - expands/reduces window in all directions (compare: shift drag) option click menu - on many menus this makes additional options appear option spacebar - opens file in QuickLook in full screen mode. |
|
CONTROL For these function key shortcuts to work on the small wireless keyboard, you press Fn. You could change this: Apple menu/System prefs/Keyboard/'use all F keys as standard function keys'. But then you would have to press Fn whenever you use 'volume' and 'lightness' (which I use constantly). Fn and Control are next to each other - try pressing them together with your thumb, and use your middle finger to reach the various Fn keys. control F2 (Fn control F2) - move focus to menu bar control F3 (Fn control F3) - move focus to Dock control F4 (Fn control F4) - cycle between open windows in all applications shift control F4 (shift Fn control F4) - cycle between open windows in all applications (reverse) (however, you don't get an application picker for this, so it's not terribly useful) control F5 (Fn control F5) - move focus to the window toolbar control F6 (Fn control F6) - move focus to the floating window control F7 (Fn control F7) - change the way tab moves focus (see Tab section) control F8 (Fn control F8) - move focus to status menus control arrow_up - opens/closes mission control / exposé (same as F3) control arrow_down - opens/closes Application Exposé (display of open windows of the same program) control option delete - force quit These need to be enabled in System prefs - first you need to actually create the Spaces (F3, click the plus at top left / top right). Then tick the newly created little boxes in System prefs. control 1 - switch to Desktop 1 (Space 1) control 2 - switch to Desktop 2 (Space 2) control 3 - switch to Desktop 3 (Space 3) control 4 - switch to Desktop 4 (Space 4) etc. control combined with mouse scroll - zoom in / out (Similar to Trackpad pinching) control eject - show shutdown dialog |
|
SHIFT shift F11 / shift F12 - changes volume without sound effect (for instance, when listening to something really nice, or when watching a movie) Use right thumb on right shift key shift option F11 / shift option F12 - changes volume by smaller increments. From 16 (little boxes) to 64 increments, four per box. shift control eject - puts display to sleep (not the computer) for example, when just listening to music shift while launching application - prevents earlier windows from re-opening shift while choosing minimise, exposé, launchpad etc. - slows down animations shift (at startup) - extensions off shift drag window side - expands/reduces window in all directions, keeps width and height in proportion, until one edge reaches edge of screen (compare option drag) shift drag corner - expands/reduces window into chosen corner, keeps width and height in proportion, until one edge reaches edge of screen (compare option drag) shift drag Dock - move Dock to left, bottom or right (grab it on the Dock devider) You can move a Finder window by dragging its edge: just don't start in the exact direction of the little arrow (or it'll expand). After that, drag in any direction you want |
|
TAB You can use tab to move through windows and dialog boxes. There are two ways to do this. There's 'Text boxes and lists only'. And there's 'All controls' (select which you prefer: System Prefs / Keyboard / Shortcuts) Both have distinct advantages. Shortcut to toggle between the two settings: control F7 ( Fn control F7). Example A (setting on 'All Controls') Create a low resolution detail from a photo for your blog Select the photo command O (it opens in Preview) Use mouse or trackpad to make a selection (drag a rectangle) command C (copies selection to clipboard) command N (your selection opens as a new Preview window) command S (opens Save dialog box) The focus will be on the name box, with the default name'untitled.png' selected. Type a new name (or just type '1' (2, 3 etc), if there are more to come - you can rename them later with Automator). Don't change the .png in the name box. Instead type 'tab' four times, which puts the focus on 'Format'. Then press 'Arrow_up' until the focus lands on 'JPEG'. Return. tab again. The focus lands on the 'Quality' slide. Press 'Arrow_left' to move the slide to a lower quality setting. You can see a tiny 'File size' indicator further down which tells you how large/small the file will be. When you're happy with the new KB size, type Return (saved). Example B (setting on 'Text boxes and lists only') Use 'Automator' to change the names of your photos Open Automator (command space - type 'au' - Return) The focus is on 'Workflow', type Return Type 'RENA' (the choice 'Rename Finder Items: Replace Text' remains) Type Return twice. Choose Add or Don't Add. Click on 'Add Date or Time' 4 x Arrow Down Type Return (to choose 'Replace Text') Click in the 'Find' box, write the first letters of your photo names (DSCO or whatever) Tab write the date (year, month, day: 141105 or 1411.05_ ) and maybe some description ( picknick.rain_ ) Drag the photos you want to change above the Rename box (a new box opens for them) Command R |
|
SHIFT COMMAND shift command A - opens Applications Folder shift command B - Send to bluetooth device shift command C - opens Computer Folder shift command E - eject (USB stick, external drive, Dvd, CD ...) Example for using those two shortcuts: ejecting an external drive shift command C / arrow_down (or first letter of external drive name) / command E shift command D - opens Desktop Folder - advantage: can be displayed in list view (command 2) and can be accessed with the window switching shortcut or Application Exposè) shift command F - opens All my files-Folder shift command G - opens dialogue box 'go to Folder:' (try command space (spotlight) as an alternative) shift command H - opens Home Folder shift command K - opens Network Folder shift command N - new (empty) Folder shift command O - opens Documents Folder shift command Q - Log Out (dialog box: 'Are you sure you want to quit all applications and log out now?') shift command option Q - Log Out immediately shift command R - opens Airdrop Folder shift command T - hide/show tab bar shift command U - opens Utilities Folder shift command W - Close a file and its associated windows shift command Z - redo (the reverse of: command Z - undo) shift command ` - switches between windows of same app, the reverse of command ` shift command ? - Help (online) shift command / - Help (online) shift command delete - empty trash (with dialogue box: are you sure ...?) shift command option delete - empty trash without asking (not sure about this: any shortcut you learn, can be used inadvertently...) Screenshots shift command 3 - screenshot shift command control 3 - take screenshot into clipboard (then switch to Preview and type 'command N') shift command 4 - display cursor for 'selection screenshot' (shoot by dragging and letting go) shift control command 4 - display cursor for 'selection screenshot' into clipboard (shoot by dragging and letting go - then switch to Preview and type 'command N') shift command 4, type space - selects window around cursor, you can move cursor to different window (even use 'command tab'), click selected window to shoot shift command 4, hold option - increases selection in all directions around cursor, let go of mouse to shoot The 'screenshot cursor' also demonstrates how many pixels your screen has: note the two numbers which tell you how far away the point is from the top and left edge of the screen. |
|
OPTION COMMAND
option command A - deselect all (after you 'selected all' in a folder) option command D - hide/show Dock (or right-click the Dock divider, to change the settings) option command H - hide other applications (so they don't distract you) option command L - downloads option command N - new Smart Folder option command O - open (selected item) & close enclosing folder (closes the Finder window which contains the opened item (document, app, window..) option command P - hide/show Path Bar (better: right-click the name at the top of any window or folder, then use Arrow_down, Return to open the enclosing folder.) option command Q - quit application & close all its windows permanently Since Lion, the Mac remembers your open windows, and reopens them the next time you open an application. option command S - hide/show Sidebar option command T - hide/show Toolbar & Sidebar (for that streamlined look. Also, using 'command O' on a folder inside a toolbar-free folder, opens it as a new window.) option command V - paste & delete from original folder (in combination with Command C) option command W - close all windows of an application without quitting it. option command 1 - clean up by name (compare with control command 1, control command 2, etc) option command 2 - clean up by kind option command 5 - clean up by Date modified option command 6 - clean up by size option command 7 - clean up by tags option command 8 - zoom into space around mouse cursor / zoom out again option command = - zoom (step by step) (this pixilates the text, try command = instead.) option command - - zoom out (step by step) option command fn f5 - Show 'Accessibility Options' (part of the Accessibility System prefs) option command eject - sleep (right-hand thumb on both Command & Option and right-hand middle finger on eject) option command on/off button - force quit option command escape - force quit shift option command escape (for 4 seconds) - force quit front-most application (without asking) option command power key - force sleep option command control eject - shut down option command shift power key - force shutdown option command shift, delete at start up - forces start up option command click Dock icon - switch to that application & hide all others option command at startup - rebuilds the desktop option command tab as inserting disk - initialise disk option command drag - create alias (where mouse is released) option command drag file on Dock icon - force that application to open it option space (when typing) - non breaking words |
|
CONTROL COMMAND control command 0 - arrange by none control command 1 - arrange by Name Suppose you change a narrow folder from list view to icon view (command 1). Now the folder window seems a bit small, so you enlarge it (drag right sidebar), but the icons remain on the left side. 'control command 1' will spread them out. control command 2 - arrange by Kind control command 3 - arrange by Date last opened control command 4 - arrange by Date added control command 5 - arrange by modified control command 6 - arrange by size control command 7 - arrange by tags (that's those colour dots which can be used to sort photos etc. Suppose you want to duplicate a group of files and then do something with those duplicates. You select the files, duplicate them (command D) which puts each duplicate underneath/next to its original. The originals are no longer selected, the duplicates are. If you tag the duplicates with a colour (carefully right-click/two finger tap one and choose the colour for all) you can then have these duplicates arranged together at the top of the folder with control command 7. Or, you could add 'Tags' to the columns in List view (Command J to 'Show View Options', tick the Tags box, maybe even make that default). Then click the top of the Tags column. (control command D - same as spacebar and command Y - opens item in Quicklook) control command O - open folder as a new window (in a folder without a toolbar you can just use command O) control command T - Add selected folder/document to sidebar control command eject - Restart control command startup key - Soft Restart |
|
CONTROL OPTION COMMAND (the next three need to be enabled in the System prefs, they are already listed there, just click the boxes: System Prefs/Keyboard/Shortcuts/Accessibility/ click boxes) control option command . - increase contrast (I think this helps some people with bad eyesight) control option command , - decrease contrast control option command 8 - invert colours - for when you read a website with white letters on black background and would prefer it the other way round. Or if your eyes get tired from the white screen and you would prefer to look at text as white on black (first try adjusting the screen brightness: F1, F2) Or on a smartphone in the dark, if you don't want it to be a torchlight on your face. (You can also invert colours by ticking the box in System Pref / Accessibility / Display / Invert Colours) control option command eject - shuts computer down Shortcut for the green zoom button control option command Z - zoom window (for all applications) You need to create this shortcut yourself: Open System Prefs (option F2, command L) click 'Keyboard' click 'Shortcuts' select 'App Shortcuts' (last line in the left box) click the little + (up comes a pop up window) Next to 'Application:' select 'All Applications' in the 'Menu Title' box type the word: Zoom in the Keyboard Shortcut box use the new shortcut: hold down control option command and type z click Add Try performing the shortcut with your left hand : ring finger on both Control & Option (or little finger and ring finger on Control and Option respectively), index finger on command and middle finger on Z |
|
SELECTING FILES IN A FOLDER
option arrow_up - selects first file in folder option arrow_down - selects last file in folder arrow_down / arrow_up - move 1 file down or up tab - move to next file in folder (alphabetically) (ie in folder arranged by date this will make the cursor hop about) shift tab - move to file above (alphabetically) shift arrow_down - selects current file(s) and the next one (if you selected too many, keep holding shift and use arrow_up) shift arrow_up - selects current file(s) and the one above shift option arrow_down - selects current file(s) and all below shift option arrow_up - selects current file(s) and all above |
| The cursor can be moved with mouse keys (for people who can't hold a mouse). 'Mouse keys' needs to be turned on in Accessibility prefs. The shortcuts are: 8 - up, 2 - down, 4 left, 6 right, 1 - diagonally bottom left, 3 diagonally bottom right, 7 diagonally top left, 9 diagonally top right, 5 mouse button, 0 hold mouse, period on number pad - release hold Mouse Button. (with the small keyboard you also need to press Fn, or switch function key function in keyboard prefs) |
|
Function Keys
|
|
TextEdit
|
|
CURSOR MOVEMENT Moving the cursor to the end of the text: arrow_down. That's it. You just hold down this one key and the cursor moves down and then to the right. Try using the following instead of Home and End. (It's quicker, because these arrow shortcuts all 'belong together'. You'll be using them them without thinking.) arrow_right - moves cursor one letter forward arrow_left - moves cursor one letter back option arrow_right - moves one word forward/ to end of current word option arrow_left - moves one word back/ to beginning of current word command arrow_right - end of line command arrow_left - beginning of line option arrow_down - end of paragraph option arrow_up - beginning of paragraph command arrow_down - end of text command arrow_up - beginning of text fn arrow_down - leaves cursor where it is, scrolls the text down 'one screen' (same as in a browser) fn arrow_up - leaves cursor where it is, scrolls the text up 'one screen' |
|
SELECTION shift arrow_left - selects previous letter shift arrow_right - selects next letter shift option arrow_right - selects next word shift option arrow_left - selects previous word shift command arrow_right - selects the line right of cursor (shift control arrow_right - does the same) shift command arrow_left - selects the line left of cursor (shift control arrow_left - does the same) shift arrow_up - selects line above ('to the nearest character boundary at the same horizontal location') (also very useful in file names, where it selects all preceding letters) shift arrow_down - selects next line (this is the fastest way to select short sections of text!) (in file names it selects following letters, but may cut extensions - better use shift arrow_right) shift option arrow_down - select following paragraph (type arrow_down again for next paragraph) shift option arrow_up - select preceding paragraph shift command arrow_down - selects all of the following text shift command arrow_up - selects all preceding text command A - - selects all (I think there's no deselect all - just type arrow up or down) shift fn arrow_up - selects 'one screen' of text above cursor shift fn arrow_down - selects 'one screen' of text below cursor discontinuous (or noncontinuous) text selection: option command drag - select separate bits of text (you need to keep option command pressed until all is selected) rectangular text selection: option drag a rectangular shape of the text - selects that bit of text (for instance, the first word in each line, to turn them all red or something) Especially good for tab-separated files. You can drag-select more 'rectangular' bits of text by holding: option command (as often as you like). You could maybe use this to 'paint' a monospaced block of text in different colours. Selecting longer Text: 1. click at beginning 2. hold shift 3. click further up/down - selects text between the two points (Variation of that for webpages: ) 1. select the first word, or just the first letters of the first word 2. scroll down (avoid clicking the page) 3. hold shift and click after the end of text. delete - deletes character to the left (keep pressed to repeat) fn delete - deletes character to the right (keep pressed to repeat) option delete - deletes word to the left (it can be quicker to re-type a word than to correct mistakes in it) command delete - deletes line to the left (including spaces or punctuation) shift option command V - paste & match (as command V, but the inserted text will adopt the style (font, size) of what it is copied into) Secondary clipboard- if you have already copied something into the clipboard you'll be needing in a moment, but want to cut and paste something else: control K (with text selected) - cut and paste to secondary clipboard control Y (with text selected) - paste from secondary clipboard TextEdit doesn't display line numbers . But you can jump to a particular line: command L, type number in the popup box, and hit return. (doesn't work if you have a 'search' of the page open, type 'escape' to close it, or click 'done') There's also this bunch of control shortcuts: control A - move to beginning of paragraph (remember: A - beginning of alphabet) control B - move one character backward (remember: B - back) control D - delete character in front of cursor (remember: D - delete) control E - move to end of line/paragraph (remember: E - end) control F - move one character forward (remember: F - Forward) control H - delete character behind cursor control K - delete from in front of cursor till the end of line/paragraph (remember: K - kills rest of line) control L - (same as command J) center selected text (or the cursor) in the window (moves text up or down) control N - move down one line (remember: N - next) (same as arrow_down) control O - insert new line (like 'Return') but after the cursor. (For breaking a paragraph into 2) control P - move up one line (remember: P - previous) (same a arrow_up) control T - move cursor together with the letter on its left one letter to the right control T - Character swap (turn 'waetr' into 'water' by placing cursor between e and t) (this moves the cursor and the letter that's on its left both one character to the right) (remember: T - transpose letter) control V - move cursor down one page |
|
SPELLING shift command ; - displays (and removes) Spelling Box (which guides you through your document) control command D (while a word is selected (in Safari), or the cursor hovers over the word (in Textedit) - displays definition & thesaurus of that word (This shortcut is useful if you don't use the trackpad. In Safari the word has to be selected, Safari can't detect (Magic Mouse: in TextEdit mouse over the word, in Safari the word needs to be selected) Trackpad: mouse over works both in TextEdit and Safari: Tap once with three fingers Escape - removes dictionary explanation There are settings in the menu (Edit / Spelling and Grammar) for 'Check Spelling While Typing', 'Check Grammar with Spelling' and 'Correct Spelling Automatically'. Escape (or F5) after typing a few letters - displays popup list of possible words (to scroll down and select) Foreign characters a c e i l n o s u y z Hold down any of these letters - displays popup menu with variations (french letters etc) to click on. (This can be disabled to get the old repeeeeeeat function back) or: add French, German etc keyboards in system prefs. By the way, I use the Dvorak keyboard. This isn't for people from Dvorakistan, but an English variation of the Qwerty layout, only much more ergonomic. Try it: system prefs - keyboard - input sources - click 'plus' at bottom left - scroll down list on the right - click Dvorak - Click blue Add button. You should now have a tiny flag in the menu bar. That's the keyboard menu. Click that, click Dvorak. Click keyboard menu again, click 'Show Keyboard Viewer'. Up pops a tiny keyboard picture which shows you what the hell has happened to your letter keys! Leave it onscreen if you like. (close it with red close button). The Dvorak keyboard is not only more soothing to your joints, it also forces you to learn to touch type! or: type a French, German etc word with English letters. Bring up Dictionary (Mouse over, control command D) (or right-click, select 'look up') and you'll get the French (etc) dictionary (your Mac will detect a foreign word!). Select and copy the word you want. (If the word is the same in English, you'll get the English dictionary. So, if you can't remember if it's 'la police' or 'le police', you're out of luck. A similar multi-dictionary approach does not work with the escape trick. When you type: franca and press escape, it doesn't proffer français. (not yet). Actually that wouldn't work anyway, you would have to press some command key for searching in a particular language. or: press option, type e, release option, type e - é press option, type e, release option, type a - á press option, type `, release option, type e - è press option, type `, release option, type a - à press option, type u, release option, type u - ü press option, type u, release option, type i - ï press option, type u, release option, type o - ö press option, type u, release option, type e - ë press option, type i, release option, type i - î press option, type i, release option, type e - ê press option, type i, release option, type u - û press option, type i, release option, type o - ô press option, type n, release option, type n - ñ press option, type c, release option, type c - ç With practice these weird combinations are quicker than selecting the pop-up variations, especially if you touch type. To quickly see where the five 'enabling' keys are, open the Keyboard Viewer (as explained above: keyboard menu (top right) - 'Show Keyboard Viewer'. Hold option and the five 'enabling' keys turn orange. |
|
Preview
|
|
Before you can look at any pictures in Preview, you need to select them.
When a folder only contains a few dozen picures and no other type of files, use command A (select all) command O (opens any picture in Preview by default). You can view pictures one by one with QuickLook. First change the folder view to List view (command 2). (Using Quicklook in Icon view is a nuisance). Select a picture: type the first letter(s) of its name. Type Space. The picture opens in QuickLook. To see the next picture, use Arrow_down. And so on. Quit QuickLook by typing Space again. Preview and QuickLook can seem slow when browsing large photos (4 MB). Try the free picture viewer Xee to look at your photos more quickly. With Xee you select only one picture and view the next picture by typing Command or with a clickety scrollwheel mouse. One 'notch' of the scrollwheel shows the next image. Using the Magic Mouse goes through the pictures too quickly. To open the first picture with Xee: right-click (two finger tap) the file and choose 'open with'. (You can use the keyboard for the choosing, but not the right-clicking, afaik) If you look at pictures/photos/comics a lot, maybe try a few other viewing apps (for instance: 'Sequential'). Preview works well with the Magic Mouse. One flick on the mouse will show the next image (not half a dozen as with Xee), you can then zoom/enlarge it by double-tapping the mouse, and then you can poke around the details of this large picture by smoothly scrolling it in any direction . (With Xee you can either scroll from one picture to the next or scroll within one picture, not both.) Preview also is an very useful basic picture editor. Check the Tab Section for a detailed example. arrow_down - show next image arrow_right - show next image swipe up Magic Mouse (1 finger) - show next image arrow_up - show previous image arrow_left - show previous image swipe down Magic Mouse (1 finger) - show previous image (Using both arrow_down and arrow_right to show the next image seems superfluous. However, if you miss-type the arrow_down/arrow_up keys in (for example) Microsoft Photo Viewer, it messes up the viewing flow. So, this redundancy can be helpful.) control command F - enter full screen In full screen you can make the thumbs list pop out by moving the mouse to the left. shift command F - slideshow This advances the (pre-selected) pictures automatically, but can also be another way to enter full screen. You can stop the 'show' (type space) and advance with arrow_right (go back with arrow_left). The difference: Slideshow automatically zooms all images to fit the screen (which you can't stop). To make (small) images fit the screen in normal (non-slideshow) full screen mode, you first need to type option command 9. Another difference: when you stop Slideshow, you have to use arrow_right to advance, you can't swipe the Magic Mouse. shift command A - show/hide 'edit toolbar' shift command S - duplicate shift command B - show image background shift command W - close selected image shift command \ - show/hide toolbar ( \ is the key with | and \ on it) command i - display information about image (useful in full screen mode or slideshow, if you look at paintings and want to look up the artist) command F - find (example: you have opened 50 reproductions of impressionist paintings. Searching for 'Monet' will only show the Monets) (click 'done' to finish) command L - rotate Left command R - rotate Right command T - show Fonts command W - close window (all the open pictures in that window) command 0 - actual size (pixel for pixel) command 9 - zoom to fit (blows up/reduces image to size of window/screen) (I couldn't find a command for zooming pictures to double their size: very small pictures are getting enlarged too much on a large screen, but are too small for actual size) command = - zoom in command - - zoom out command * - zoom to selection (you drag a rectangle, type command * and your selection fills the screen) (zoom out again with command -) command delete - move foremost image to trash option command C - adjust colour (popup slide menu) option command 0 - actual size of all option command 1 - content only (no side preview) option command 2 - thumbnails (you can no longer vary their size) option command 3 - table of contents (names of files, similar to list view folder) option command 4 - highlights and notes option command 5 - Bookmarks option command 6 - contact sheet Displays all pictures (like an icon folder). Enlarge these icons with 'command ='. Open selected icon with return option command 9 - zoom all to fit crucial for large screens and not easy to find: only shows in View menu while Option is pressed option command - - zoom all out ` - show magnifier (circular around cursor) control command F - Enter Full Screen (careful, don't mess up your pictures by playing with these, make copies first) control command H - Highlight Text control command l - Line control command N - Note control command O - Oval control command U - Underline Text control command R - Rectangle control command S - Strike Through Text control command T - Text option command Y - start slideshow option command W - close all (?) option command arrow_left - collapse all option command arrow_right - expand all command 1 - continuous scroll command 2 - single page command 3 - two pages option command G - Go to page |
|
Safari
|
|
command = - zoom in (enlarges text and pictures and rearranges them on top of each other to fit the screen) (aka 'text reflow') command - - zoom out (the key next to the '=' key) command 0 - zoom to default size control combined with mouse scroll - zoom in / out (Similar to Trackpad pinching) View menu/ Zoom Text Only (no shortcut) to restrict zooming to the text. (Click again to re-enable zooming text and pictures) option tab - moves focus to next link (keep both keys pressed to zip through all the links) (the 'focused' link has a little frame around it ) return (with the focus on one of the links, ie frame around it) - opens that link command return (with the focus on one of the links, ie frame around it) - opens that link as a new tab Save image from webpage: Two finger tap on image (up comes a dialogue box) type S (selects 'Save Image As...') Return 'Back' (Correction: the following Terminal command seems to no longer work with OS 10.9.3) delete - used to 'move to previous page'. In fact, it was the standard key for 'back' since 1995. Apple removed it in 2012 because people kept typing it by mistake while editing text online, sometimes loosing what they had written. Also, Apple prefers you to use the Magic Mouse/Trackpad. The swipe gestures for 'back' are good, but the page sometimes loads a bit slower. You can re-enable the delete key to open the previous page with Terminal: Command Space (opens Spotlight) type T (or Terminal) (until it's selected) Return (opens the Terminal window) Paste this piece of code into the Terminal window: defaults write com.apple.Safari com.apple.Safari.ContentPageGroupIdentifier.WebKit2BackspaceKeyNavigationEnabled -bool YES Command Q (quit Terminal) quit and re-open Safari This will also re-enable: shift delete - move (back) to next page (If you find you don't like it after all, paste the same code, but replace YES with NO.) (Thank you, Macrumors) Alternatively use these: command [ - move to previous page command ] - move (back) to next page command arrow_left - move to previous page command arrow_right - move (back) to next page One finger swipe sideways right/left on Magic Mouse - move to previous/next page Two finger swipe sideways right/left on Trackpad - move to previous/next page Most people click the 'back' button, which obviously takes the longest of all. That's most people for you. command A - select all command D - add bookmark Find: command E (when a word on the page is selected) - search for that word on the same page (other occurrences) command F - open search box (top right of Safari window) to find text on that page option command F - search the web return - find the next occurrence of the word(s) you're searching for (navigate found items) shift return - find the previous occurrence of the word(s) you're searching for (navigate found items backwards) command G - find the next occurrence of the word(s) you're searching for. Using 'Return' is easier When you read a long page, and need to look at something at the beginning or end, or loose your spot by brushing against the Magic Mouse, or use command arrow_down instead of Fn arrow_down by mistake, try to remember a word or phrase you just read and search for it (command F). When the word appears more than once, keep hitting Return. You can also use this to 'bookmark' a spot where you stopped reading: copy the last paragraph to a TextEdit page. command H - hide Safari Toolbar/ address field I prefer large windows and so hide everything that's not actual window content/viewing area. You can hide the toolbar/address field: go to View menu and click hide toolbar reopen them this way: command L - opens toolbar and moves focus from browser window to address field (so you can type a new address or google something) tab (when a normally hidden toolbar is open) - closes toolbar again command N - open home page as a new window shift command H - open home page, changes whatever page is open into your homepage command R - reload page Tabs command T - add new Tab (this used to be 'hide/show Toolbar') command click on link - opens link in a new tab, but keeps showing original page shift command click on link - opens link in a new tab, showing the new page control tab - switch to next tab shift control tab - switch to previous tab I prefer opening new windows, because the tab-bar makes the viewing area smaller. Switch between new windows with command ` or use App exposé : control arrow_down command Q - quit Safari command W - close window / tab command , - open Safari Preferences control command D - pops up dictionary definition of the word your cursor is on (better: three finger tap on trackpad) (Escape: removes dictionary) control command F - enter/exit full frame (full frame used to be: command escape) (I don't use full frame because Safari in full frame can't hide the toolbar. Make windows large by dragging the sides: New windows will open in the same large size.) Scrolling: Option arrow_down - scroll down one screen-length, minus a small overlap Option arrow_up - scroll up one screen-length, minus a small overlap Command arrow_down - scroll to end of page Command arrow_up - scroll to beginning of page On a small keyboard, with the Fn key in the left corner, it's easier to do this: Fn arrow_down - scroll down one screen-length, minus a small overlap Fn arrow_up - scroll up one screen-length, minus a small overlap Fn arrow_left - scroll to beginning of page Fn arrow-right - scroll to end of page Or, if you prefer, the spacebar: Space - scroll down one screen-length, minus a small overlap shift Space - scroll up one screen-length, minus a small overlap On a large keyboard: page up / page down keys Side Scrolling: Option arrow_left - scroll one screen-length to the left (if the website is arranged sideways or too large for the screen) Option arrow_right - scroll one screen-length to the right option drag scrollbar - 'smooth scrolling' (slows down scrollbar-scrolling) Make your viewing area larger by hiding all this stuff: command / - show/hide Status bar (that's the strip at the bottom of the window) shift command B - show/hide Favourites bar shift command L - show/hide Side bar shift command T - show/hide Tab bar control command 1 - show/hide Bookmarks sidebar control command 2 - show/hide Reading List sidebar Selecting: shift arrow_down (when you have already selected a word/line) - extends selection down one line shift arrow_up (when you have already selected a word/line) - extends selection up one line (in fact, use the same arrow selection shortcuts as in TextEdit - see above) Source Code 'Show Page Source' is listed in the (hidden) Developer Menu: Go to Safari preferences (command , ) / click on 'Advanced' / tick 'Show develop menu in menu bar'. Now you can use this shortcut: option command U - show page source Alternative: Save the webpage to your computer. Right-click the icon of the webpage. Choose 'Open with' and 'TextEdit' . You can use TextEdit to change the Source code. Maybe make another copy first. |
|
Typing
|
|
All this shortcutting makes a lot more sense if you can type reasonably fast.
That means typing without looking at the keyboard.
The problem is that watching a really fast typist makes you want to give up right away. But that sort of speed is not necessary at all.
You don't need to do a class or anything. Just learn the basic hand position:
Left hand: little finger - resting on A Ring finger - resting on S Middle finger - resting on D Index finger - resting on F Right hand; Index finger - resting on J Middle finger - resting on K Ring finger - resting on L little finger - resting on ; That's it. Just put you hands in that positition (notice the two little thingies on keys F and J - they are there to guide you). Try to reach the other letters from that basic position, and try not to look at the keyboard so much. Don't worry about speed. |
|
This is (mostly) a list of shortcuts I made for myself, because I keep forgetting stuff.
Hopefully some of it is of some use to others. If you have any questions, please go to a computer discussion forum. |